Print a Test Label
Once you have configured ShipStation Connect, you may want to print a test label to ensure everything is set up correctly.
A few things to note about creating a USPS test label:
The selected service must be a USPS service. The test label will be a test label for the service and package type selected for the order.
ShipStation will not create a shipment record and will not send any notifications.
If testing with an active USPS account, no funds will be deducted from the account balance.
To create and print a test label:
-
Select an order in the grid or open an order's Order Details screen.

Configure the order with a USPS service, package type, and a weight.
-
Click the drop-down triangle next to the Create + Print Label button.

-
Select Print through ShipStation Connect and choose the printer you wish to print to.


ShipStation will send the test label to the printer. The resulting label will use the order Ship From and Ship To addresses, but will include the words Sample and Void to indicate it cannot be used for a shipment:

Use the same steps above to print a LIVE label, just use the Create Label option instead of test label.
Send Customer Tracking Number
Once you have printed the LIVE label, the system will automatically add a note to the order and email the customer at BOOKMRKT.COM with the tracking number.

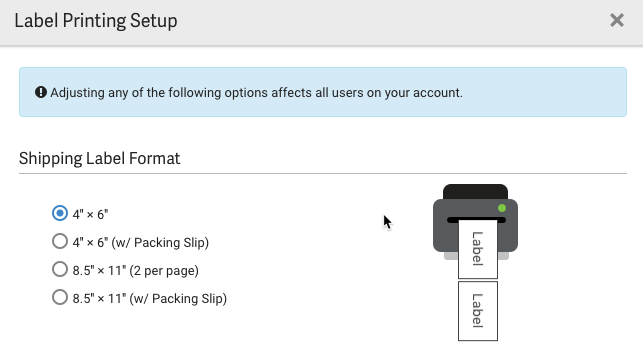
Adjust Printing Label Stock
If your mailing label is printing wrong onto your label, try adjusting the label stock size.
Go to Settings > Printing > Printing Setup and check your label's Document Options.
For thermal label printers (Zebra, DYMO, etc), the label format should be set to one of the 4" x 6" options.
For standard desktop printers (laser, inkjet, etc), the label format should be set to one of the 8.5" x 11" options.
Regardless of which printer you use, your printer preferences should also match your ShipStation label format and DPI.
Label DPI in ShipStation can be set to 203 DPI or 300 DPI. If you are unsure which DPI you should choose, check your printer documentation.